Saving Images
You may want to save an image for one of three reasons:
- The image pixel values have been altered, for example using the
ROI Masking tool.
- The image has been imported and you
do not want to go through the import procedure again.
- You want to change the image format, for example from UNC to
Analyze ™ format.
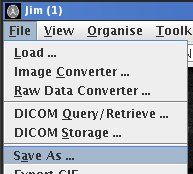
To save an image an image, select "Save As ..."
from the File menu: 
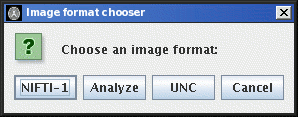
You will first be prompted to select a file format for the saved
image. This may be one of:
Selecting "UNC", "Analyze" or "NIFTI-1" saves in one of these formats regardless of
the original format. Selection of the file format is done from the
image format chooser:

Note: the Analyze ™ format does not permit the patient-
and scan-specific information to be saved. The Analyze image
header contains only the most rudimentary information about the image.
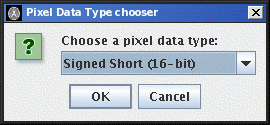
You now have the opportunity to change the data type for the saved
image:

Simply press the  button to keep the same
data type, or select a new data type from the menu. If you choose a new
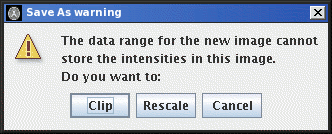
datatype that has a smaller dynamic range than the original image, you
will receive the following warning:

For example, if the original image has 16-bit short, these have a
potential range of -37268..+32767. Selecting a unsigned 8-bit byte
data (range 0..255) for the saved image would mean that not all pixel
values can be stored. The options are:
- Clip. Any pixel intensties outside the dynamic range of the new
image are set to the extreme values of the dynamic range. In the
example above, a pixel intensity above 255 would have an intensity
of 255 in the output image; a pixel intensity below 0 would have an intensity
of 0 in the output image.
- Rescale. All pixel intensities are scaled with a constant scaling
factor such that they all fit within the dynamic range of the saved image.
Next you will see a File Chooser to
select the directory and file name for the saved image.
Note: if the image pixel values are altered by image editing
operations, on unloading the image, you will always be prompted
to save the image. At this stage you may chose either to discard
the image edits, or to cancel whatever prompted the image unload.


 button to keep the same
data type, or select a new data type from the menu. If you choose a new
datatype that has a smaller dynamic range than the original image, you
will receive the following warning:
