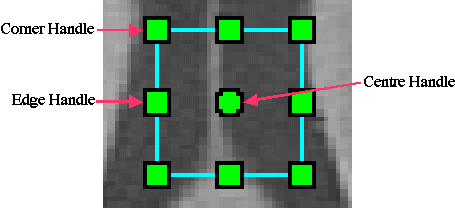

To change an ROI, click and drag one of the handles:
To change an Elliptical ROI, click and drag either:
The following types of ROI can be rotated:
When an ROI has a lot of handles, not all the handles may be visible. Only
a selection of handles is shown, such that the visible handles do not
overlap. As you zoom in on the ROI, more and more handles can be seen,
since they do not overlap at high zoom. This makes editing the outline
of Irregular ROIs quicker, since coarse changes can be made at low zoom
before zooming in for fine-detail changes.
Irregular ROIs may also be edited using the "Eraser" tool. When an
Irregular ROI is selected and editable, the tool becomes active:
You will typically use the eraser tool to remove part of an Irregular
ROI that has been produced by contour following, where the
contour follows the image feature for most of its outline, but
then deviates towards another image feature. For example, below
is an attempt to outline a small brain lesion in the frontal white matter using
edge detection and contouring. The outline has deviated into the
second (almost confluent) periventricular lesion below.
To remove the left hand "limb" of the ROI, click on the
After the erasure, the original ROI will be split into two, as shown
below. Any unwanted ROIs can now be selected and deleted.
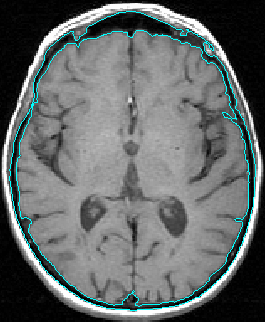
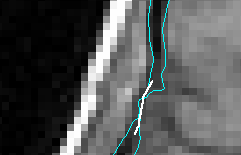
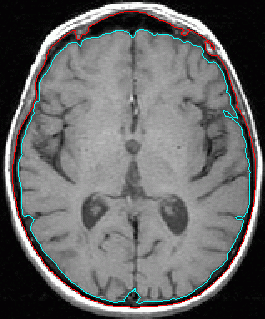
Another example of the use of the Eraser is to separate contours that
are joined by a small "bridge". In the following example, after
attempting to outline the brain by following a contour, the
brain was joined to the scalp by a very small bridge of tissue:
Rotating ROIs
These ROIs can be
rotated by holding down the "Shift" key and dragging one of the
corner or edge handles. When rotating an Elliptical ROI, a pair of red
crossed lines appears, showing the new orientation of the major and minor
axes of the ellipse.
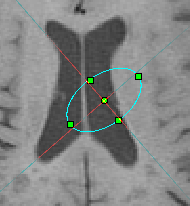
When the mouse is released, the status bar shows the
final rotation angle.
Vertex handles on Irregular and Curved Line ROIs
You can move the individual vertices of an Irregular or Curved Line ROI, using its vertex
handles. To see the vertex handles, first select an irregular or
curved line ROI, and then use the ROI toolkit Edit Outline
from the Edit menu (or use the keyboard accelerator
"Control-O"). The ROI will then appear like this:
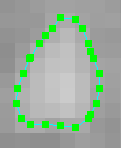
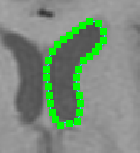
An ROI seen at low zoom - only a selection of the vertices has a
handle shown.
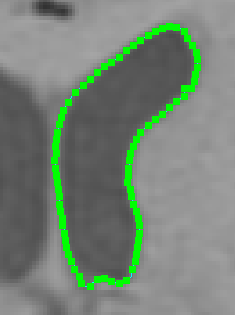
The same ROI, with higher zoom - more handles are visible.
Note: you can zoom and scroll the image as you are editing the
ROIs.
Using the Eraser
 .
.
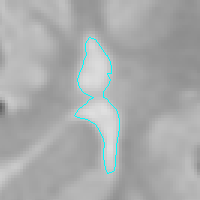
 icon, and draw an erasing line that separates the ROI
from the unwanted limb. Points erased will appear as a white
line.
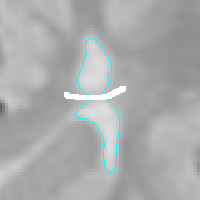
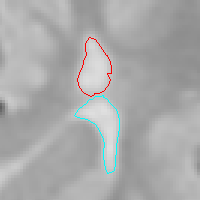
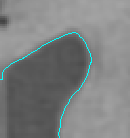
The original ROI.
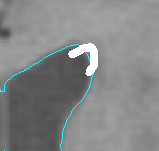
The erasor line, starting and ending inside the ROI, but looping outside.
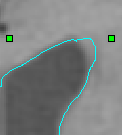
The extended ROI, includes the area enclosed by the loop.
The width of the eraser line is measured in screen pixels, and is set
from the selector
To delete an ROI, first select it,
then either choose
Note: Sometime when
you create ROIs or copy/paste them, you will see a message stating
that an ROI already exists in the slice and has not been
created. The ROI Toolkit does not allow a regions of the same type
and shape to appear twice in the same slice. This is to prevent
unintentional duplication of ROIs that lie exactly on top of each
other, so that the user would be unaware of one of the ROIs. If
this happened, then area and volume measurement might give the
erroneous results because of these "hidden" ROIs.
Note: When you have a selected slice, you can cycle through the
ROIs by pressing the ">" and "<" keys. As you press the ">" key
the next ROI in the selected slice is selected. As you press the "<" key
the previous ROI in the selected slice is selected. Deleted ROIs
cannot be selected in this way.
Note that the maximum number of undo operations is set in the
user preferences of the ROI toolkit.
Eraser Width
 .
.
ROI Deletion
Cut from the ROI Toolkit Editmenu, the
keyboard accelerator "Control-X", or press the delete key.
Other ROI Edit Operations
Other ROI editing operations are available in the ROI Toolkit Edit
menu:
ROI Edit Undo
When you add or change ROIs and make a mistake or the result is
unsatisfactory, the operation can be undone. To undo the last
operation, select Undo from the Edit
menu:  , or use the
keyboard accelerator "Control-Z".